Like your garage or office desk, macOS can easily become cluttered over time. Files, apps, and other digital detritus can build up, often without you realizing, causing your everyday computing tasks to take longer and longer.
A quick blast of decluttering on your Mac can make a huge difference, so it once again becomes straightforward to find files or apps, without it feeling like a major undertaking. Here are some of the clean-up tips that really work.
Clearing up the desktop
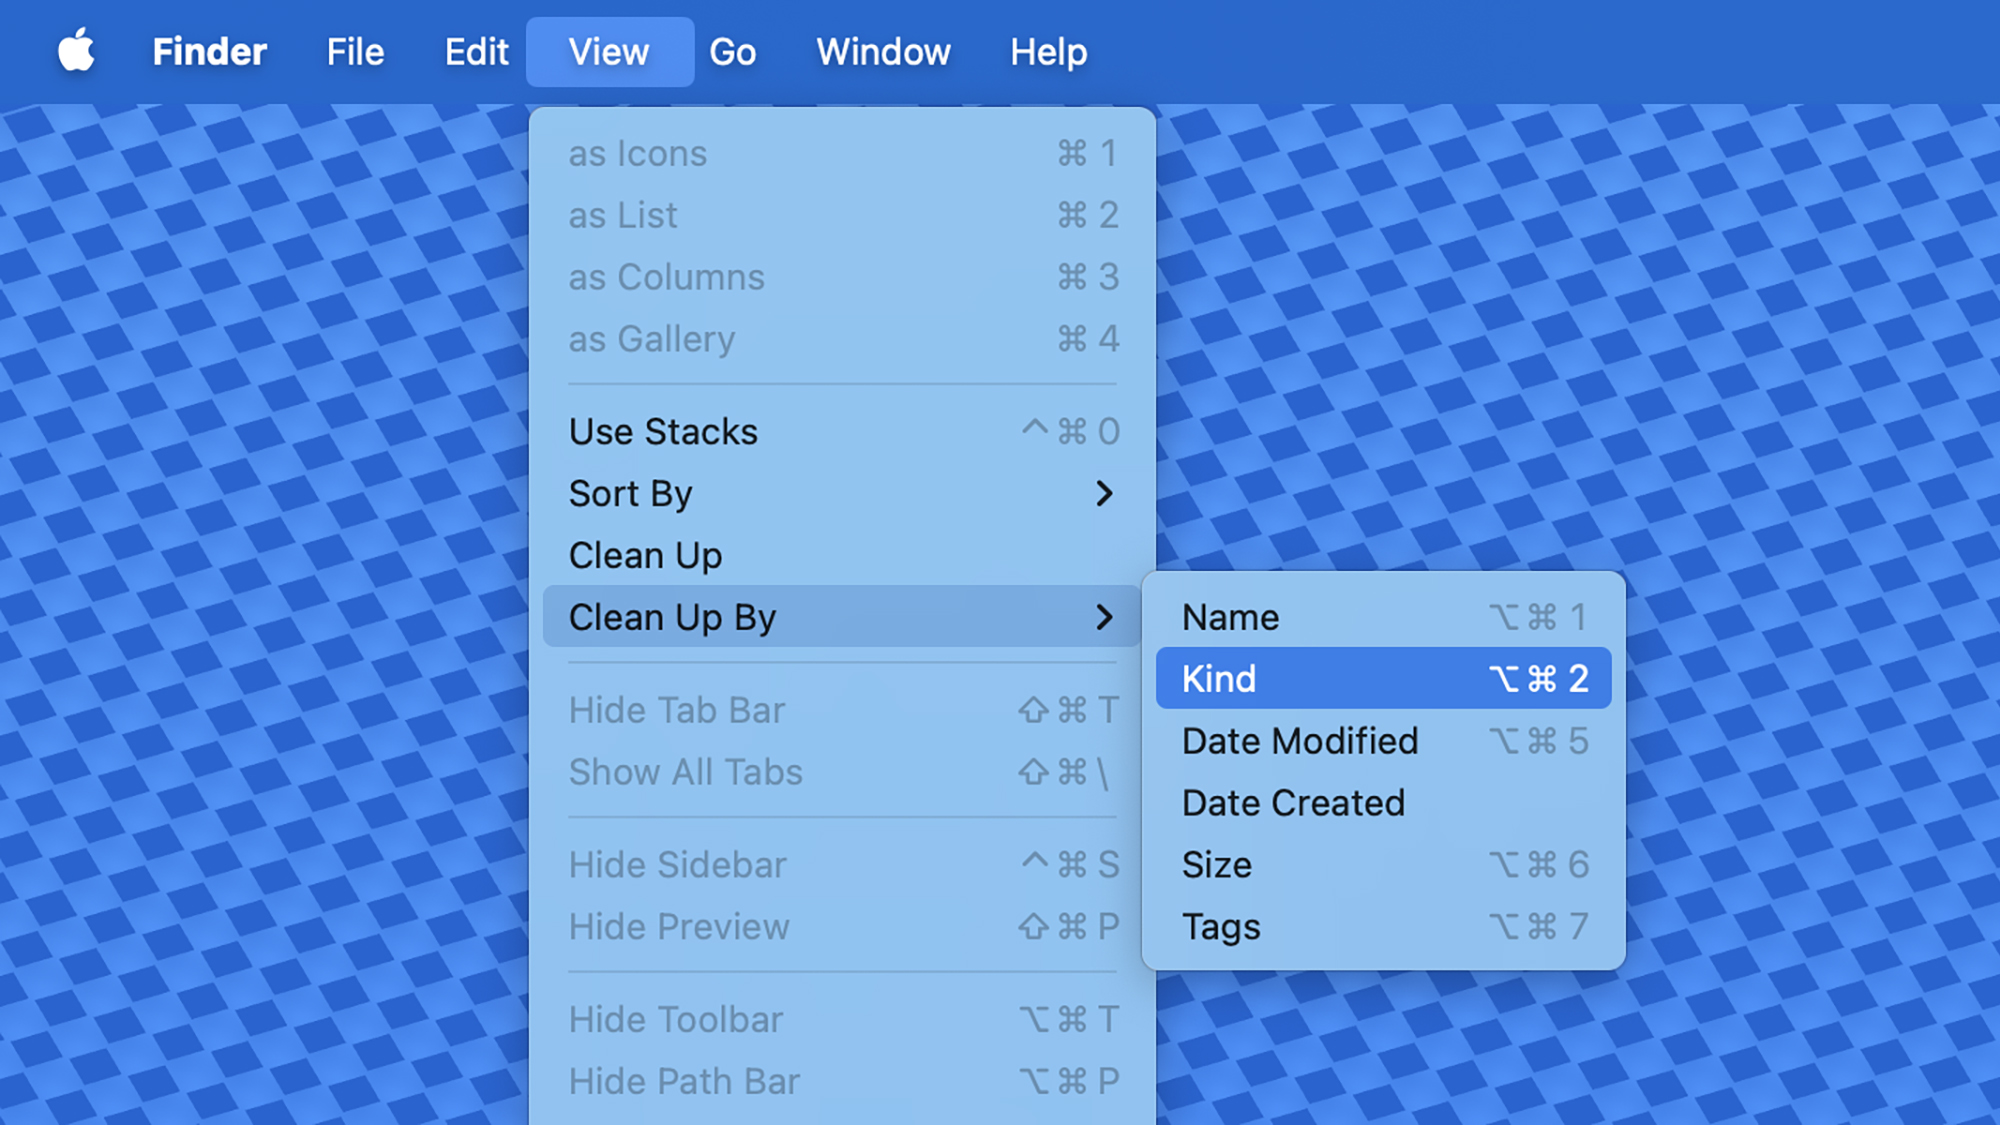
Many of us have a tendency to dump all kinds of files and shortcuts on the desktop, without really thinking about it. Not only does this obscure your wallpaper, it slows down macOS, and makes it more difficult to find what you need.
There are some built-in options in Finder that might help. Click on a blank area of the desktop, then open the View menu: You can use the Clean Up option to snap everything on your desktop to a grid, for a neater look. In addition, you can make use of the Clean Up By menu to choose how they’re sorted (by name or date, for instance).
Also on the View menu, you’ve got a Use Stacks option. This takes desktop organization to the next level, by piling files of the same type (such as images or documents) on top of each other—just click the pile to see the individual items again. With stacks enabled, click View then Group Stacks By to change how they’re sorted.
Here’s another idea that requires a bit more manual work, if you use the desktop as a temporary storage space: Create a “Temporary” folder on your desktop, and use that instead of the actual desktop, and only for files you don’t need long term. You can then periodically delete everything in that folder without worrying about it.
Tidying the interface
There are a variety of ways you can tidy up the look of macOS, especially in terms of two specific areas: the menu bar at the top of the screen and the dock at the bottom. Perhaps the best place to start is to give fewer apps permission to appear in the menu bar, but you’ll need to dive into the settings for each individual app to do this.
You do have some third-party options you can turn to, such as Bartender. The software will set you back $20, but you can try it out for free first: It lets you apply all kinds of customizations to the menu bar, and you can completely change its look if you want to. You can also put your choice of menu bar icons into a submenu, leaving you with a menu bar that looks much cleaner.
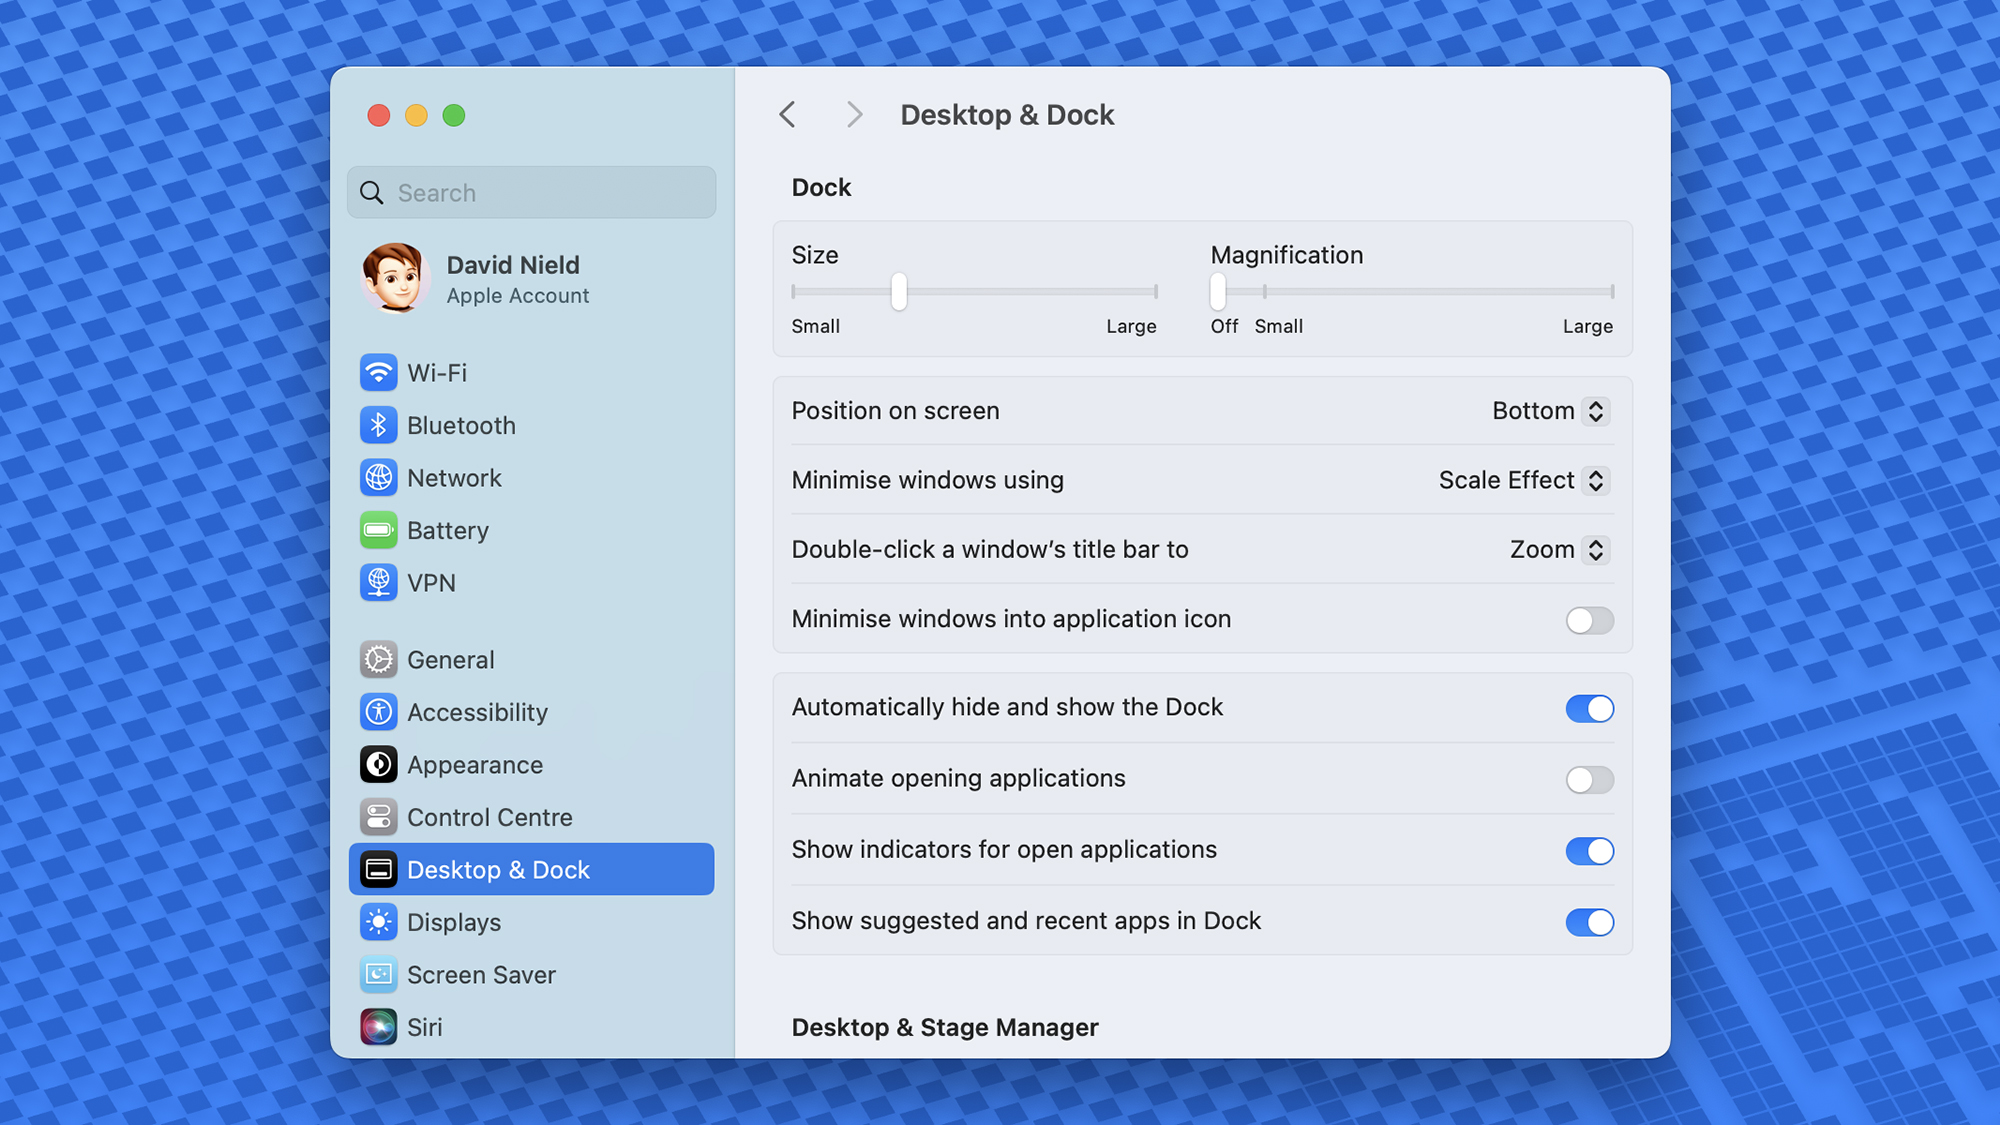
When it comes to tidying up the dock, you’ve got a few more built-in macOS settings—open the Apple menu, then choose System Settings and pick Desktop & Dock to see them. From here you can hide the dock when it’s not in use, hide suggested and recent app shortcuts, and turn app launch animations on or off. You can also make the dock bigger or smaller.
If there are shortcuts in the dock that you don’t think you’re going to use, right-click on them and choose Options and Remove from Dock. In the space of a few minutes you can have a dock that’s much less cluttered and easy to get around—and that isn’t even visible when you’re not using it.
Removing temporary files
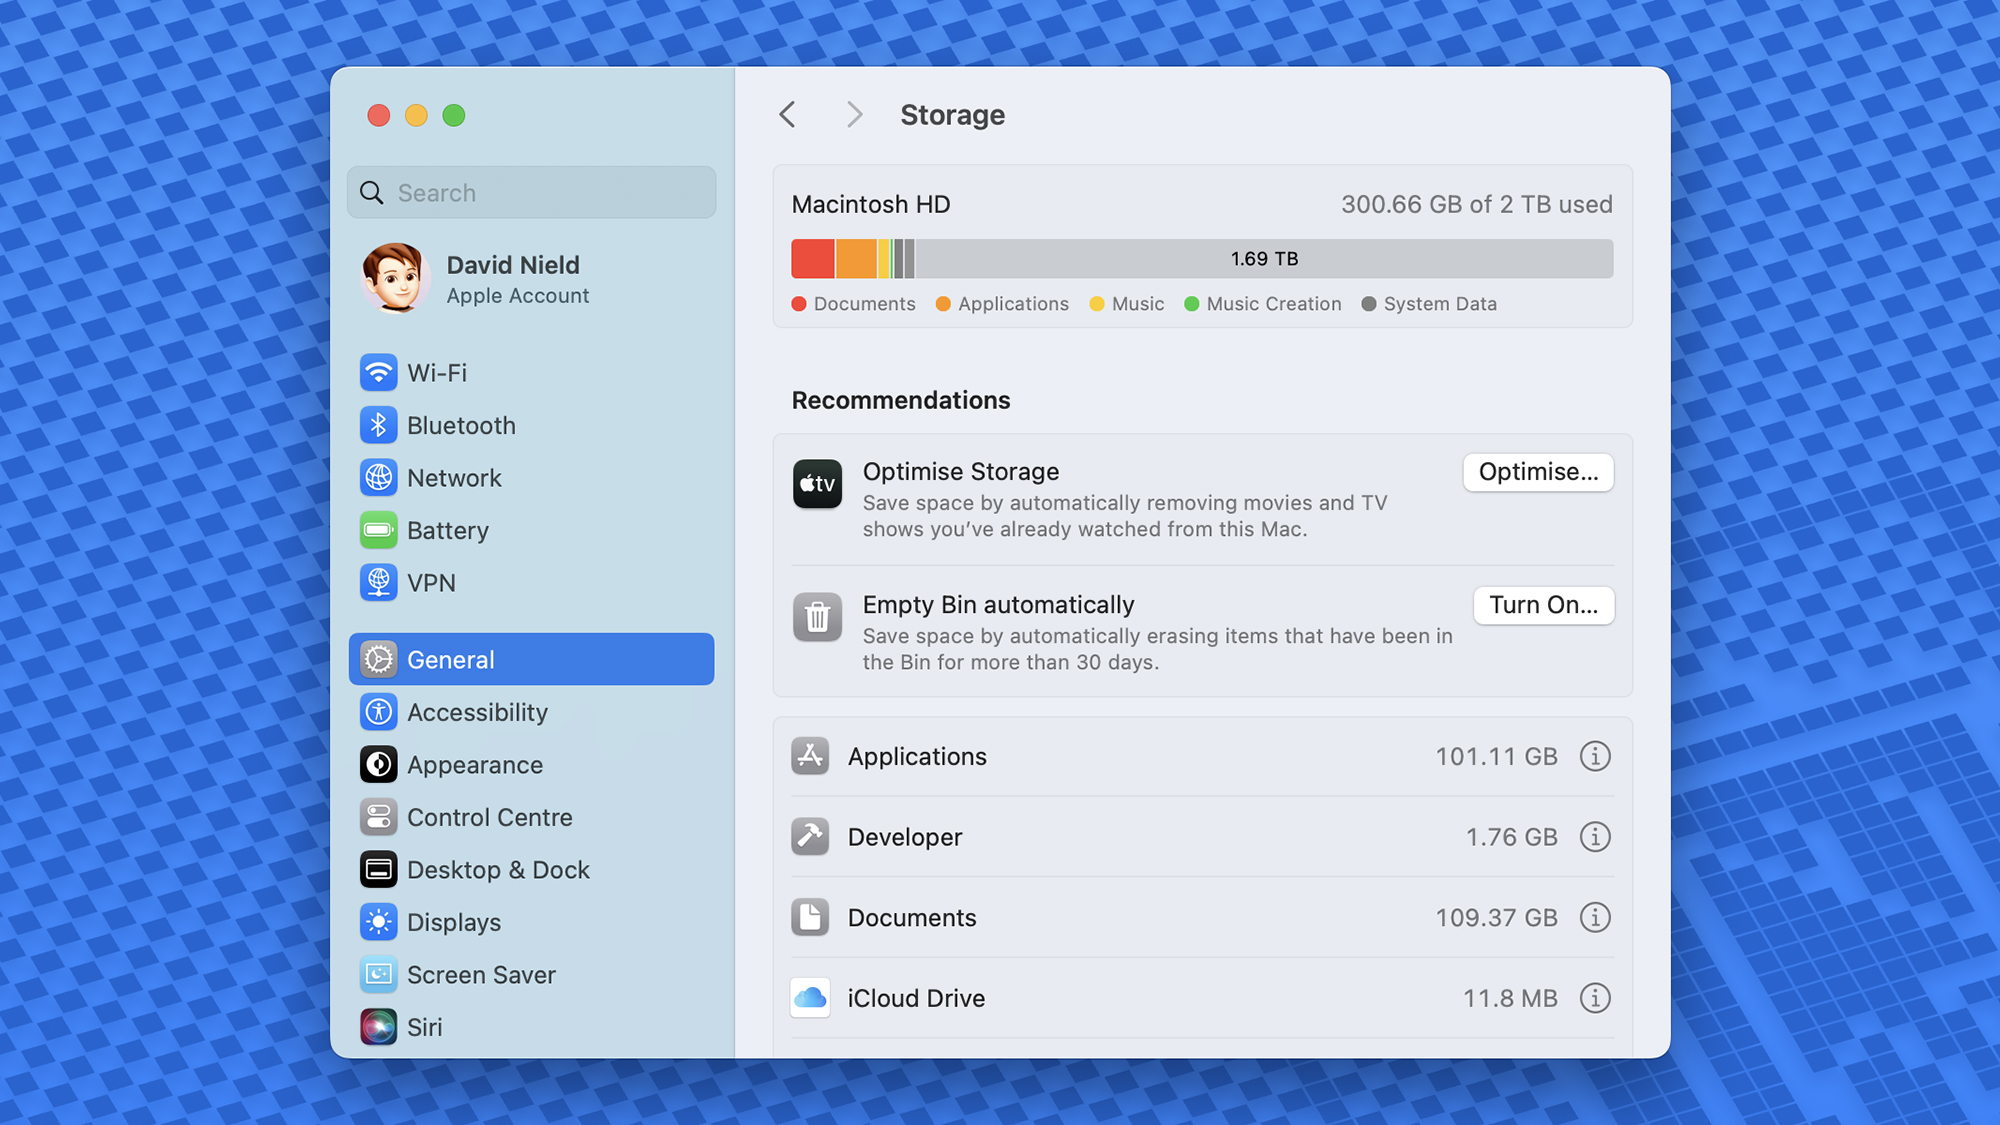
Temporary files can quickly build up on your macOS system, and it’s not always obvious—you just eventually get to a point where the operating system is crawling along and you’re getting messages about storage space issues. When this happens, macOS has tools to help.
Open the Apple menu, then pick System Settings, General, and Storage. Right at the top of the dialog box you should see how the storage on your Mac is being used—so you’ve got a quick reference to the worst offenders when it comes to hogging space.
Underneath this storage reading you should see a number of suggestions from macOS about how to free up room. These will vary depending on how your system is set up, but you might see links to remove Apple TV content you’ve already watched, or to empty the Trash folder, or to move certain items over to iCloud. Click on any of the suggestions you like, and follow the instructions.
Sometimes you can find relevant settings within individual apps. In the case of Apple Photos, for example, open the Photos menu and pick Settings: Under the iCloud tab, you can have the app reduce the quality of photos and videos stored locally on your Mac, while keeping the full resolution versions in the cloud.
Uninstalling unused apps
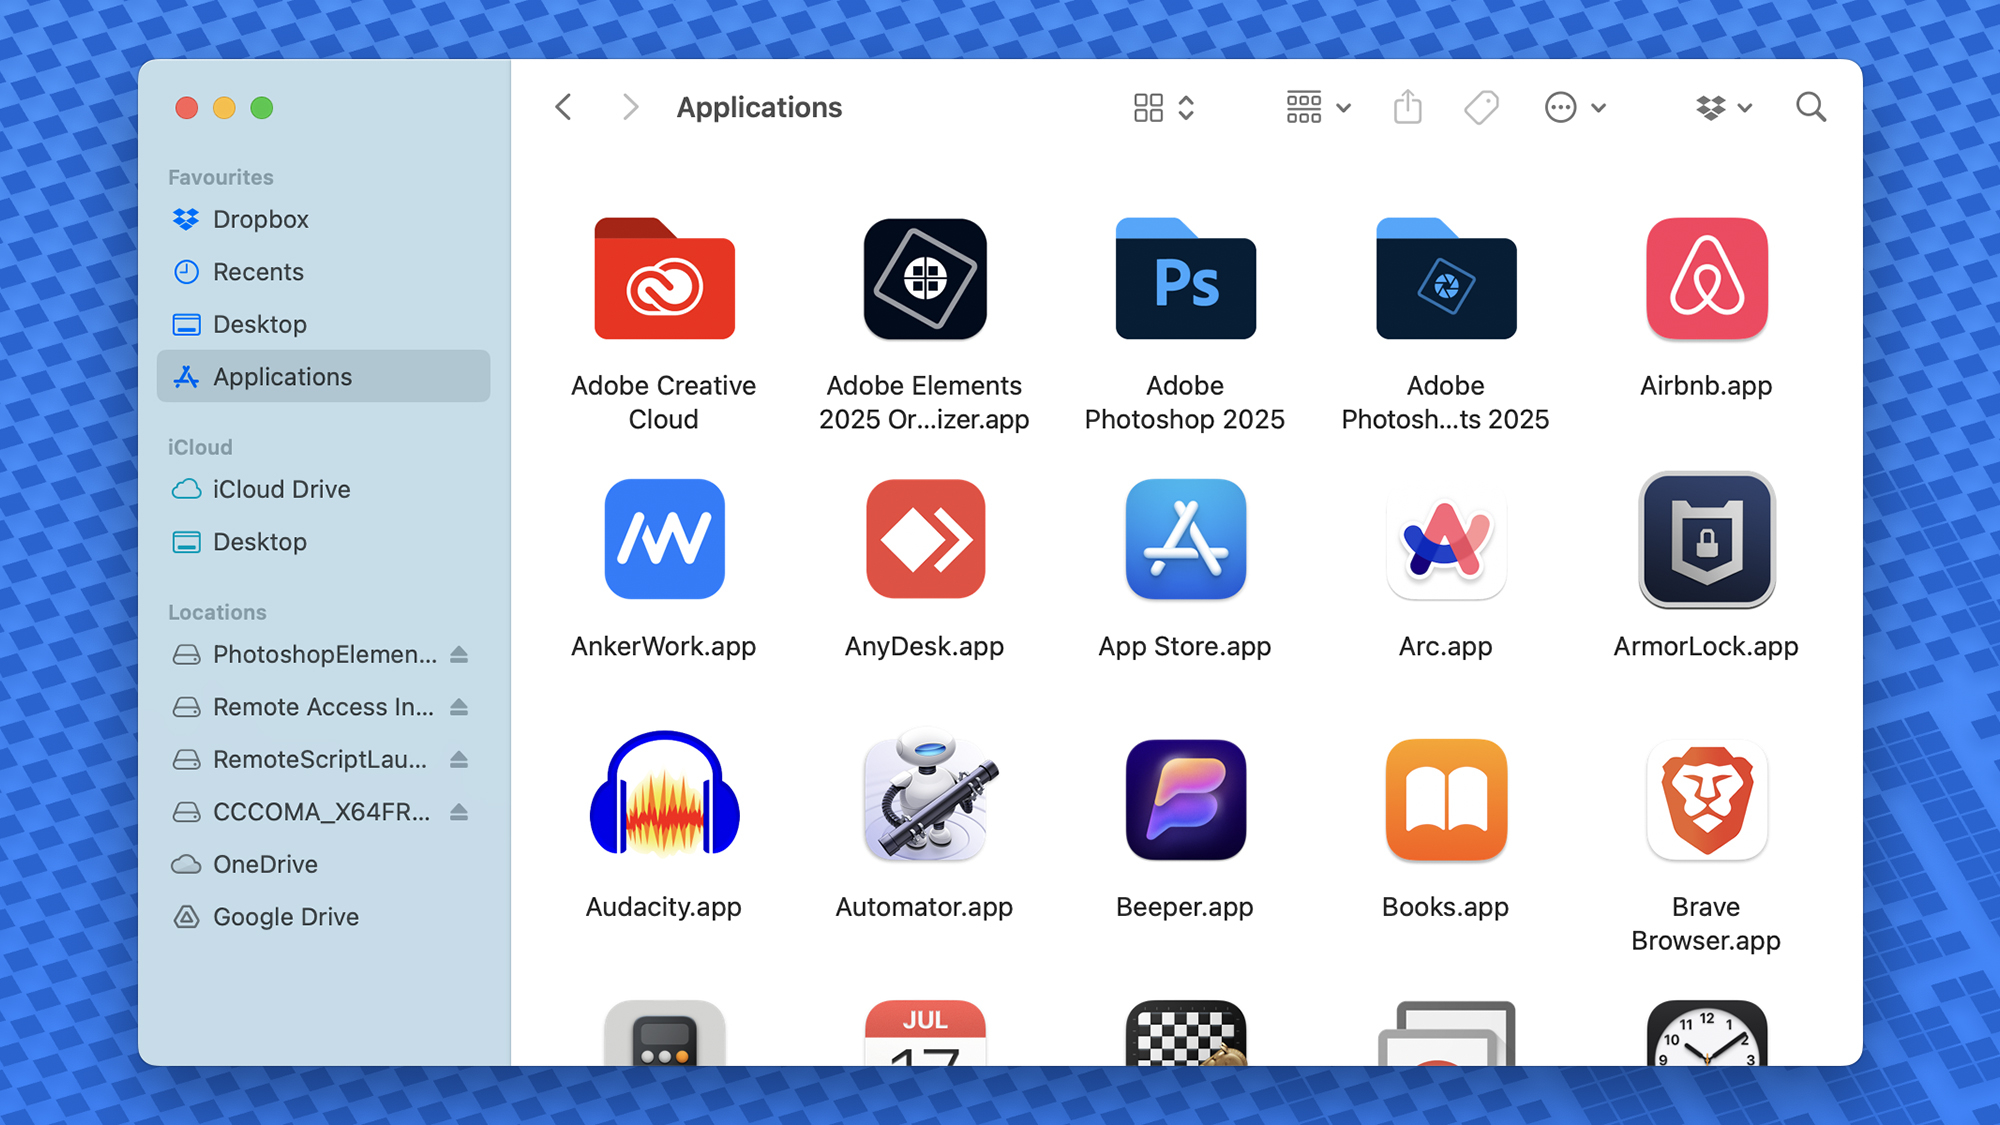
One of the best ways to free up space on your Mac computer—and to declutter screens like Launchpad and the Applications folder at the same time—is to remove apps that you’re not regularly using. Bearing in mind you can reinstall them anytime you like, it makes sense as a low maintenance clean up technique.
If you open the Apple menu, then choose System Settings, General, and Storage, you can click the small ‘i’ info button next to Applications to see the programs that are taking up most room. To actually remove them, you need to launch Finder and open the Applications link on the left (or choose Applications from the Go menu).
The process of removing software varies from app to app. Sometimes you’ll see a folder, with an official uninstall tool in it, on the Applications screen. For other apps, you can drag the program shortcut down to the trash icon on the dock and uninstall it that way. If you’re not sure, have a look online for the instructions related to a specific app you’re trying to remove from the system.
Even if you don’t uninstall apps, you can at least make sure they’re not starting up at the same time as the operating system—unless you want them to—and taking up valuable CPU time and space in the RAM. If you open the Apple menu, then pick System Settings, General, and Login Items & Extensions, you can choose which programs are allowed to start up with macOS and run in the background.
